


Offer
Provide additional details about the offer you're running.
FLASHSALE
This store requires javascript to be enabled for some features to work correctly.


Last Updated: November 2, 2026
Quick Summary
The best protective braid styles depend on your hair type. Fine or thin hair suits smaller, lighter braids with low tension, while thick or coily hair can carry larger braids and twists when parts are neat. Damaged or relaxed hair should avoid heavy extensions and tight cornrows.
Protective braid styles can keep your hair safe, reduce daily handling, and give you a fresh look that lasts for weeks.
Start with density and texture. Fine or low-density hair needs lighter braids and less weight at the root.
Here is a quick way to narrow your options:
A common mistake is choosing a style from a photo without checking how much weight it adds.
Watch out: Tight braids that cause pain at install are a warning sign.
If your hair is fine, thin, or already stressed, low-tension styles are the safest choice.
Small, lightweight braids with loose parts are generally a good fit here. Ask your stylist to keep sections no thicker than needed for a clean finish.
Pair any low-tension install with a lightweight moisturiser at the scalp. Dry hair snaps more easily when it rubs against the braid.
Box braids are one of the most popular protective styles. The key factors are braid size, the weight of the hair you add, and how tight the parts are.
The Big Star Box Braids Crochet Hair with Curly Ends comes with 22 strands per pack. The product range includes lengths suitable for various styles, ensuring flexibility for different preferences.
Scalp comfort matters as much as sizing. Ask for light tension, and tell your stylist if you feel pulling.
Thick and coily hair has more room to handle structured styles, but "thick" is not one thing. Density, strand thickness, curl pattern, and porosity all change which braid protects your hair rather than stresses it.
Use this as a general starting point, then adjust for your own breakage history and scalp sensitivity.
Any of these styles can be safe or damaging depending on installation. Traction alopecia, hair loss from repeated pulling, is a general concern with protective styling. The warning signs are consistent across hair types:
If any of these appear, the install was too tight. Ask for it to be redone with looser tension.
When visiting any stylist, you can ask for a low-tension install and specify that you want to be able to move your scalp freely.
Added hair is where most of the weight comes from, so the choice of extension matters as much as the braid pattern.
A practical check: hold a finished braid between two fingers. If it feels heavy enough to pull when you tilt your head, it is too much hair for that section.
Not every protective style needs added hair. Flat twists and simple cornrows without extensions are generally lower in weight, which can suit fine or low-density hair.
Big Star Box Braids Crochet Hair with Curly Ends | 14", 18" & 24" | 22 Strands →
The style name matters less than the fit: match density and strand thickness to braid size, match porosity to your moisturising routine, and treat tension as the deciding factor for every install.
Preparation makes the biggest difference to how well a protective style lasts. Skipping it often leads to frizz, tangles, and breakage within days.
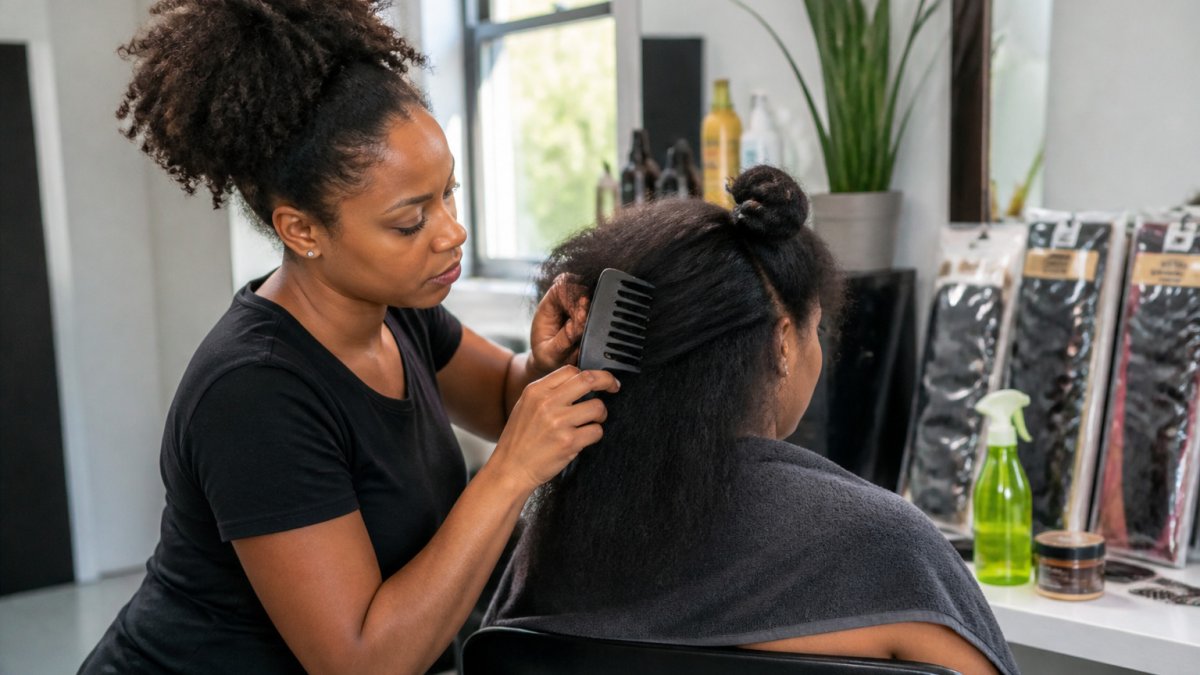
Start with clean hair. Wash it gently with a moisturising shampoo, then detangle with a wide-tooth comb while the hair is wet and conditioned.
Next, moisturise and seal. A light oil or leave-in conditioner helps reduce friction during the install. Africa's Best Braid Sheen Spray with Conditioner is made to moisturise braids and cornrows, help prevent dryness, and ease an itchy scalp.

Finally, plan for takedown. Set a date for removing the style before you start.
Most protective braid styles are designed for several weeks, but the right timing depends on the style, the weight of the install, and how well you care for them. Leaving braids in too long is one of the most common causes of matting, buildup, and breakage at takedown, so treat wear duration as part of the style choice rather than an afterthought.
These are typical ranges most practitioners work to. Your own hair, scalp condition, and regrowth rate should shift them up or down.
A simple rule: the heavier and denser the install, the shorter the safe window. Fine or low-density hair should sit at the lower end of each range.
You do not need to avoid water for weeks. A clean scalp is part of protecting the hair underneath, and a buildup of sebum and product is what causes most itching and odour.
Wrapping the hair with a satin scarf or sleeping on a satin pillowcase is a common way to reduce friction overnight. For longer or heavier styles, gather the braids into a loose pineapple with a satin scrunchie, never a tight elastic, so the weight is not pulling on the hairline overnight.
Once a week, run a fingertip along the hairline and around the temples. Look for:
Any of these means the style is ready to come down, even if you planned another two weeks.
Itching that does not settle after cleansing, a persistent headache, or visible pus around a braid are signs to remove the style and see a doctor or dermatologist.
Takedown is where most damage happens. Plan for it the way you plan the install.
Match the wear window to the style, cleanse the scalp on a schedule, check the hairline weekly, and take the braids down slowly with moisture. That routine protects the hair underneath far more than any single product.
The table below summarises the typical wear windows for each style, as described in the article.
| Style | Typical wear window | Note |
|---|---|---|
| Small knotless braids | 4-6 weeks | New growth at the root tangles after about six weeks |
| Box braids (medium) | 4-6 weeks | Larger sections can frizz at the root sooner |
| Cornrows and feed-in braids | 2-4 weeks | Sit flat, so they collect product and sebum faster |
| Two-strand and Senegalese twists | 4-6 weeks | Watch for slipping rather than waiting for a set date |
| Faux locs | 6-8 weeks | Roots need checking weekly due to weight and density |
| Crochet styles | 4-6 weeks | Pull can occur if the cornrow base loosens |
Choosing a protective braid style is easier when you know your hair type, the weight you can handle, and how long you want the look to last.
Start with the product that matches your hair texture, then plan your install and takedown dates. If you want a professional to do the work, ask your stylist about low-tension options and let them know your hair history before the appointment.
Fine or low-density hair usually suits smaller, lighter styles such as knotless braids or small box braids, because they add less weight at the root. Thick, coily hair holds larger braids, twists and faux locs well, and styles with a flat, neat parting help shape the install. Choose the size and weight of the extension to match your own hair density.
Box braids can work on fine hair if you choose a smaller braid size and a lighter synthetic or human hair pack. Heavy, large braids pull on sparse hair and can cause breakage along the hairline. Ask for thinner sections, avoid tight parts, and keep the braid weight modest so the root area is not overloaded. A low-tension install and a shorter wear time both reduce stress on fine strands.
Most protective braid styles are generally kept in for several weeks, depending on the style and how well your scalp tolerates them. Leaving braids in longer can cause frizz, matting and buildup, and it can increase tension at the root as the hair grows. Remove them sooner if you notice itching, soreness, or sudden shedding, and plan a gentle takedown rather than pulling the braids out quickly.
Low-tension options include larger, looser braids, flat twists, and styles that avoid tight ponytails and heavy extensions at the hairline. Keep the parts large, avoid pulling the hair tight at the root, and tell your stylist if you feel pain during the install, since pain is a sign of excessive tension.
"Show off incredible feedback from your customers"
